

Okay maybe not exactly glass.
Should serve to block the wind, though, while still letting in light.
(For the non farm people out there, those are feed sacks. Very handy.)




I haven’t written much lately … I’ve been quite busy, doing one thing or another, recovering from a cold, struggling to sleep, catching up on sleep, working, all sorts of things.
So I’ll just jump in with a bit of a generic update.
The past couple of days I’ve done a bunch of outside work, because Winter is Coming. There’s almost always snow before Halloween, so I have to get a move on if I want to get these things finished before I have to pull everyone in off pasture! With fewer animals, though, we are able to still have everybody out grazing, which is awesome. Some years I’ve had to start on hay by now, to spare the pasture from overgrazing. We’ve still got lots of grass, so that’s wonderful.
I’ve been making bigger changes, as the remaining four sheep are going to be gone by the end of the month: Cherub, The Boy’s 4H lamb (who is now 7!) will be going to a friend’s house for her retirement, and the remaining three will be turned into sausage. Two are Icelandic, Lambie and Jellybean, and I plan to get their hides back and make sheepskin rugs from them … I know for ‘city folk’ that may seem awful, but they are simply gorgeous pelts and I want to be able to fondly remember them and keep my toes warm at the same time. And we love the sausage our butcher makes, so it is a good way to honour the gift of their lives.
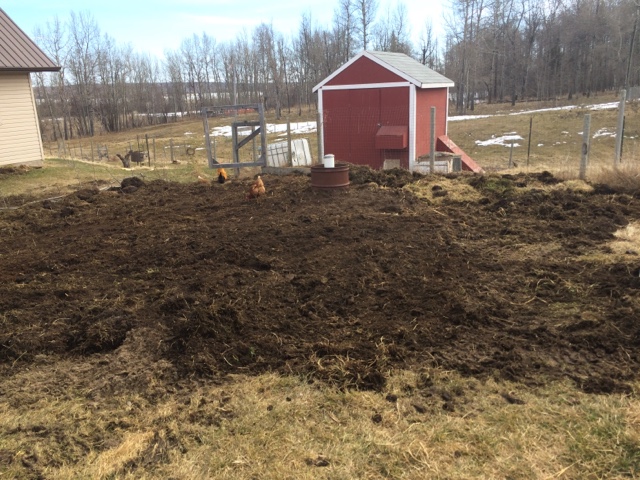
Since we won’t need a separate sheep area this winter, then, I removed some fences from the winter pen, making one larger area. I used the nice tall fence wire to fully enclose the barnyard, removed one gate (which I will need at the Self Serve Cow Buffet), and built the alleyway entrance to the aforementioned Cow Buffet. My Farm Helper will have to come put in the rest of the posts for that feeding area, but it’s almost ready to go, which is good - then I can have my hay delivered and roll the bales in. (We are doing this, if you are curious what I mean by Cow Buffet.)

Basically, we will be able to have the bales dropped in the driveway, roll them into the feeding area by hand (they are easy to roll when they first come off the truck, it’s just impossible once they freeze in place!), remove all the bale string, and run electric wire in front of the front row. The cows eat the bales, then we move the wire backwards when they have cleaned up what they have dropped. No more pitching hay into a feeder, no more trying to get bales up the hill in the winter, just a self-serve Cow Buffet. The space we are using for feeding is what used to be my garden – the quack grass is unconquerable with the energy and resources I have, so this is a better use for the space. Besides, come spring, the area will be trampled down and matted with manure and hay and straw … and I can feed a few pumpkins and zucchini to the animals in there, then close the gate. This spring I fed Sasha a pumpkin in the barnyard, and we got two pumpkin plants in the spot where she’d left some seeds! I can put a few potatoes in as well, because potatoes will grow quite happily in a pile of straw, so I can at least have a few things growing in the nicely fertilized and cow-and-donkey-weeded space.
And donkeys really DO eat thistles! I watched Miss May purposely munching down on thistles in the pasture yesterday, which is just FANTASTIC.
I also tightened a couple of weak/broken spots in the fences, so that I can be sure the winter pen is reasonably snug (come spring everyone wants OUT ON THE GRASS and they will push if the fences are weak). I have also thought some more about my winter watering plans, though I haven’t done anything with that yet, I’m pretty worn out from all the work I did so far!
I took Miss May for a walk down the gravel road today – she did pretty well, stopping a few times to make sure ewerything was safe, and even though a truck came down the other end of the road, everything went well (my neighbours are very good about slowing down around stock!). We both can use the exercise, and it’s good training for both of us as well. I can see that training a donkey will be very good for me: donkeys need a lot of time to ponder things, to be absolutely sure everything is safe before they proceed. They freeze when they aren’t convinced of their safety … a response I completely understand. It’s my job to be empathetic and encouraging, to show Miss May that whatever she is seeing is safe: For instance, she didn’t’ want to walk through the narrow gate by the water trough for some reason. It looked unstable, perhaps, or too skinny. So I tied her to the post and let her look at it for awhile, I walked through several times, and tried to coax her through, and let her stand by the post when she said she wasn’t ready yet. Eventually she decided it was all right and came through. The next day when I took her through, she didn’t even pause. Donkeys have great memories!
I’ve been reading a lot on donkey training – and I measured Miss May again today to confirm her size and weight: she is 48” at the withers (12 hands) and about 700 lbs, which means I can ride her! Only with a very light saddle, and only after we get some solid ground work under our belts, but it is a possibility!
So I spent the day researching, looking at saddles and tack and learning about ground driving and surcingles and lunge lines and bitless bridles.
It’s all very exciting.
Oh, and when we got back from our walk, I put Miss May in the pasture with all the other animals. Everyone was totally calm about it, having been able to get to know one another through the fence for the past couple of days. Then when I went back outside later in the day and called her, Miss May came running right up to me! Yay!
She is such a great animal. She likes to stand there and have me scratch her chin and hug her neck. I’m so happy she came to live here!
I am really not sure what the level above “trifecta” is but I think even if there is one, I’ve exceeded it. I am declaring this last accomplishment a Gold Medal achievement.
First, some context.
If you’ve been following along, you know that I have been bitten by the reorganize/tidy/clear out the old stuff bug lately. I reorganized the north wing living area (because I wanted my chair by the window, and then everything else shifted) and followed that up by clearing out the loft (including building a reading/spinning/knitting nook out of an Ikea bookcase).
Then I sat down and looked around the newly organized loft and all I could really see was …
… the unfinished ceiling.
We have lived here for … what, seven years? eight? Somewhere in there. And the ceiling just never got dealt with. We made an attempt with some panelling, but it was unwieldy and didn’t look good. We would have put the same stuff up as is on all the walls, but whoa, talk about a fussy job. It would take ages. And it would require a person lift of some kind. A contractor would make more sense. But there was no budget for a contractor.
And then, some money arrived unexpectedly. Let’s just say it was a much appreciated gift that gave me the freedom to actually do something about the ceiling.
So I went to the city, talked to the helpful people at All Weather Wood and came home with enough materials to experiment with cedar shingles on the ceiling. I started in the loft, where I could work without needing a ladder for some distance, and after some false starts and modifications, I decided it was worth continuing. Then I fell off the ladder. Gently, really – I fell forward, not backward, and banged my legs up on the way down, but it was enough to make me realize that this was not really a workable strategy.
Take home message: using a ladder leaning up against an inward slope is very dangerous. DO NOT TRY THIS AT HOME.
I phoned the nice people at DV Rentals and arranged for scaffolding. Voila: a workable strategy. More wood, proper infrastructure, lots and lots of nails for the air nailer, and we were off to the races.
(Yes, there really was a platform that went from one side of the scaffold rack to the other, but we’d relocated it temporarily when this was taken.)

When all was said and done …

No, it’s not perfectly even. I knew I’d never get it even, so I staggered the shingles on purpose. They stagger a little more than is reasonable in a few places, but oh well. There’s also one spot above the fireplace that I just could not reach safely from the scaffold: the frame wasn’t wide enough to scoot past the wood stove, and after leaning as far out as I dared, I decided that perhaps The Reluctant Farmer (who is, after all, a firefighter who runs training sessions on safe ladder usage) might be able to get up there and deal with that one tricky spot some other time. Not falling from two floors up seemed fairly important right about then. I did a lot of very slow moving while on top of that scaffold: reaching up to support myself on the ceiling as I walked, crawling from one end to the other rather than walking, lying on my back and doing Michaelangelo imitations, you name it.
I didn’t have enough stain to cover all the new boards I put up, but those can be done with a stain pad on an extension pole at a later time. There are still some pieces that need to be put up, but most of what’s left is finicky fitting that I am really quite terrible at doing, but the thing is …
I can live with this.
It feels much more comfortable.
I realized that I’d been avoiding spending time over here, avoiding organizing and cleaning it up because it just felt like a construction zone anyway. There’s one noticeable place that needs to be covered up before that sense is completely eliminated, but my goodness … to glance up and see wood instead of vapour barrier and insulation? To have the ceiling covered (with real wood and an air pocket which will add more insulation value to the roof as well)?
It ain’t perfect, not by a long shot, but I did this and it’s damned good, if you ask me.
I am bruised all over – the fall actually didn’t damage me too badly as we instituted proper first aid measures immediately, but all the pressure points of legs and shins and arms where I braced myself against scaffold pipes are turning blue. My hands ache from gripping the air nailer – it got heavy after three days of use. My shoulder muscles are sore from so much lifting over my head (even though The Boy did the vast majority of the heavy lift-and-carry-fetch-and-lug work for me, bless him).
But I am sitting at the kitchen table looking out the window … and not seeing any yellow insulation or floppy plastic, the whole house smells of cedar, and I am content.
Many thanks to the generous provider of these funds (you know who you are): you didn’t have to make the choice you did, but you did, and I am grateful.
And deep appreciation to The Boy, who hauled and carried and tolerated the noise late at night and loaded and unloaded the van and let me use his vehicle to haul materials and scaffolding and fed me and brought me water and lemonade and gave me ice packs when I fell and spotted me when I had to use the ladder again later on and delayed taking a shower until a time when I wasn’t up on the scaffold, just in case. Couldn’t have done this without your help, Boy. Thank you so much. You are a very good kid.
And now I think I might go lie on the couch and stare at the ceiling or something.
Because you know what? It’s awesome.
… I cleared out the loft today.
I wore shoes this time, but my feet still hurt. As does my thumb, I poked it on something sharp.
A little back history here: the loft was, originally, The Boy’s bedroom. Then the addition was built when The Reluctant Farmer and his kids arrived, and I moved out of the downstairs bedroom in the south wing. It got stuffed full of storage things and fibre things and before long you couldn’t even walk in there.
One day, The Boy and I decided to switch rooms. He got a door, I got more space, things were good. There was room for the store stock, a loom, plus some storage.
Then the shop moved out, and the upstairs was just … a catastrophe. It wasn’t anyplace you wanted to spend any time. It was a place to go dig up what you needed and escape as quickly as possible.
Right now I seem to be in the place where I want all the spaces to be user-friendly. At least mostly tidy (there is still a good ways to go with some of the piles that have been removed from their original locations, but we are making definite progress here) and welcoming. Light. Comfortable.
The loft was none of these things. It was quite frightening in fact. So I got started.

Like I said, frightening.
But I firmly believe that good infrastructure eases most problems … so I set out to improve the infrastructure. Hence the power tools and lumber in the picture.
I’ve been dreaming of a little spinning/reading nook … I spent a bunch of time last night online looking at ideas, but of course I am constrained to work with only materials I already have at hand – no purchases allowed. I think that this new spinning/reading nook should earn me a place of honour on the Ikea Hacker’s website: using the framework from one IVAR section and several no-longer-needed wine rack shelves, I made a base; then covered it with tongue and groove pine (we still have some outside: I used some of the watermarked stuff, partly as an experiment to see how it looks when stained – and honestly it looks fine). Then I took three IVAR shelves and the two remaining wine racks and built a bookshelf, which I screwed to the end of the platform surface, using four of the predrilled holes in the side rails as guides. A few more pieces of pine and the shelf had a top rail and was sufficiently sturdy that it wouldn’t wobble.
Pictures are a little strange as it was dark by the time I was ready for photos but here you go:

The platform will get some kind of mattress, some day … probably in the short term it’ll get a down quilt and several blankets piled on it. For the purposes of the picture I spread out two cotton blankets I wove and tucked a little hand knit pillow in the corner … I took it all off afterwards, though, as the stain needs to cure the rest of the way (I love Watco Danish Oil!)
This one shows the bookcase a little better: it’s not got any books on it, just spinning and knitting stuff. though that may change as I improve my stash storage.

Under the platform there’s room between the shelves (which act as cross-braces) to tuck banker’s boxes and assorted other bits and pieces. The edge of the platform is surrounded by an old bed dust ruffle – if I am not mistaken, it once belonged to my cousin who is a big Texas A&M fan, it’s a lovely shade of burgundy! I’ll try to get some better pictures in daylight tomorrow. If I can still climb the stairs.
The lamp base is a piece of wood – I think my Dad made this, I should ask where it came from! It’s been around pretty much as long as I can remember, anyway!
The pony wall at the top of the stairs had never been properly finished: I added one more piece of tongue and groove, which created about an inch and a half ‘lip’ at the back of the wall, then used two boards of different widths to surface the rail. At the left, where a person might be leaning back against the wall (like a headboard), the shelf is flush with the edge of the panelling, but further out, it widens and has a bit of an overhang. It’ll be a lovely spot to put treasures once the stain dries!
The two shelves are positioned to be easily accessible from the platform, but without being so deep as to get in the way as you round the corner. The bottom shelf is quite close to the floor, but I’ve found it is much easier to keep the floors clean if stuff is up … even by a few inches! That shelf is wide enough to hold two of my favourite baskets for yarn and knitting. The top shelf is narrower and presently has a couple of cones of yarn (including one that is stuck full of the various circular needles I found while cleaning up) and some thread. I’m sure it’ll find more appropriate contents before long.
The bin on the right contains various knitting patterns in hanging file folders. I need a better spot for it, but that was sufficiently out of the way for now.
What you can’t see is the big pile in the corner: several boxes that are going to the ‘take it or leave it’ at the dump, three HUGE Rubbermaid type bins of fibre goodness that are going to be listed for local Ravellers to take off my hands, another bin for the new owner of Flannelberry Creek, and one for my fibre neighbour. Two huge bags of garbage left as well, plus a pile of boxes bigger than I am.
The loom has a spot just to the left of the ‘nook’, there’s lots of room to work there and it doesn’t impede traffic. The roof slants sharply down at that corner, so I mounted a very wide shelf and hung a fabric skirt all around it: underneath is storage for banker’s boxes, the sewing machine, and some more fibre. It’s much tidier having it out of sight like that! The shelf is currently covered with a disorganized pile of books – I need to figure out some proper bookcase management, but that can wait. The small loom and a couple of bins of useful things are over by the front of the loft, and two spinning wheels are upstairs now. And the gold tub chair, which is ugly but so ridiculously comfortable.
AND THERE IS STILL LOTS OF ROOM TO WALK AROUND!
I am amazed.
Yes, there are still several ‘landing zones’ of stuff to be cleared up yet … piles of books in the basement, hats and mittens in the hallway, a corner of assorted fibre stash oddities, and some things to rehome or sell … but oh my goodness, what a relief.
Tomorrow, I promise, I’ll stay in the recliner. I have computer work to do … and sore feet!
ETA: Daylight view!The barn is dark inside. It has windows, and I usually have the door open, but still, it’s quite dingy in there.
So today, after converting two sheep stalls into one larger cow stall, I decided to experiment with whitewash. We had bought a bag of lime some time ago, which I used to help dry out the soggy ground in the barn intermittently, and I thought … hey, what about whitewash?
Mix the lime with some water and add a bit of salt, paint it on the walls, ignore the fact that it looks like it’s barely covering the surface and just keep painting … and voila! White walls!

The stuff comes off like dust for the first little while … I hear it needs to cure for a day or two (and even then it’ll flake off a bit with rubbing, but hey, lighter is better!). I covered all the gates, the pen walls, the interior barn walls, everything but the ceiling (which would be nice to have done as well .. maybe next year). It was a messy job, but it looks so much better in there! I will go out and test it tomorrow and see how it’s sticking.
I also installed the head gate, which I got as part of the milking machine barter deal a few weeks back: I painted it with some rust-covering paint, and hung it up in the milking stanchion. I had it in there yesterday, actually, and Sasha didn’t mind it at all, so I am very pleased.
This picture is kind of blurry, but it’s the only one I’ve got at the moment:

So yeah, after all that work my feet hurt and I’m very weary … I came in and had a shower, coated my feet and arms and back with Voltaren, and sat down to watch a movie (Inception – cool!) and knit. Now for some hefty sedatives and off to bed!
Today was the first test of the new sheep feeder, designed by me but built mostly by The Boy (I did help a little).

The prototype was built earlier in the summer, as I mentioned here. We did modify things a little: instead of cutting the hog panel in half, we bent it, so that if you look at it from the side it makes sort of an L shape, with the long side of the L coming off at an angle. This way the feeder is deeper and can hold more hay – the smallest squares of wire are along the bottom (and yes, some hay will fall through but they will eat it off the ground under the feeder … if it becomes a problem I can always lay boards in there, as well), and then the larger squares are up on the angled piece where the sheep poke their noses through to get the hay.
I’m hoping that because of the height of the feeder and the way it angles down, they will stop pushing their heads all the way through the wire squares, which is seriously annoying (and not good for either the sheep or the feeder). The feeder looks like it’s taller at one end than the other, and it is, but it’s level in the larger scheme of things … the pasture itself is on a bit of a slant. We went with level as opposed to ‘even height from the ground’ so that one end is closer to the ground than the other, which will make it easier for sheep of different heights to eat comfortably.
There’s still a bit more to do out there – those posts leaning up at the end are going to be needed for fence repair and to get the cow’s feeder built – Sasha is out on a tether munching the long grass in the ditch this afternoon, she’s easy to lead out to other grass, so she will be fed that way for a while longer. The grass is free (hay is not!) and she’s portable, so that just makes good sense. Plus it makes her easier to catch when she knows that “most of the time when the person puts that long leash thing on my halter I get to go out and eat all the grass I want”.
Rolling a couple of bales over (with a lot of help from The Boy, whew those are heavy bales!) and feeding everyone and picking up a few things was all I had energy for today. But, I had energy for that, and I did it, and so yay.
Oh, did you notice the bales are all up by the feeders? We didn’t have to move them! My Hay Farmer was able to drive the truck right up the hill and drop the bales where we needed them. Yippee!
Now I can do some indoor work on the computer, which is tiring to the mind but not the body. Oh, but first I need to call the butcher and arrange for some of those sheep to be turned into lamb meat – anyone want some? :)
Before we know it, the snow is gonna be here. The pressure to get the summer jobs finished is now at maximum.
I split a pile of wood today, and then stacked it all (we really really needed that done - and the splitter is borrowed from a neighbour so I had to do it in one go, and then send it back).
This is what I did:

I am very happy with the new wood shed. Much tidier than what we had before, and it was pretty easy to build - those are giant long fence posts (which I got by accident, I didn't think to specify length when I ordered them) with scrap wood for the ends and a piece of metal roofing on the top. We did have to stand on something to pound in the posts, but the resulting structure is tall enough that I can stand in it. There are pallets on the bottom, to keep the wood up off the ground, as well as one in front so you can stand on that to get a load to take inside. The kindling goes in rubbermaid buckets that are kept outside – there’s bits of wood and bark all over the ground after splitting, I will ask the Small People to pick that up when they are here next, it’s a good job for people who start off closer to the ground than I do.
The Boy was outside working, so after I came in for lunch, I went back and helped him get finished. We now have finished sheep feeders, and the steps to securing the winter pasture are about 75% done, maybe more. All that's left is to get a gate mounted, so that the barnyard can be locked off from the rest of the pastures, make a feeder for the cow (that's easier than the sheep feeders, just needs a couple of posts and some existing panels and pieces of wood attached in different places than they currently are), and clean up of the barn and barnyard (i.e. shoveling and raking, and moving stuff around).
Then we have hay to be delivered and that'll need to be moved from where it gets dropped off, and the water trough will need to be put into it’s winter box (there is a lid that covers half of the trough, keeping the evaporation down). If I get organized enough, I’d like to set up a recirculating heat reservoir, but I don’t know if that’s gonna happen in time. Hmm, I’m not actually sure we have a working trough heater, either – need to check on that too.
The plan, of course, was to have a lot of this done earlier in the summer, but plans have a way of just doing their own thing and so … well, here we are. Further ahead than in many other years, thankfully, but we still have a few more important jobs to finish up before the snow comes. I still remember one October when it snowed and I said “oh well, that’ll melt in a couple of days” … and it didn’t melt. That was the start of winter that year! So, I try to be ready by the end of September if possible, mid October at the latest … just in case Mother Nature decides to pull a fast one on me again.
We’re not quite there … but we’re close. Whew.
The Reluctant Farmer decided that purchasing a robotic floor cleaner would be a good investment in our relationship. I was skeptical, I mean, I ought to be doing the floors myself. It’s expensive. It’s a gadget. Surely a broom and a mop …
Well, the broom and mop haven’t really been keeping up very well, since they are powered by me. And I haven’t got a lot of extra juice these days. So I accepted his generous offer, and today, the Braava 380T arrived in the mail. A little square device, a bit smaller than those countertop sandwich makers that were popular in the 90s, it was super easy to set up. Batteries for the little cube that it uses to assist with navigation were even included in the box!
Now, I wasn’t really sure how well this thing would work. Obviously, I figured it would be better than what I was doing – sweeping with a broom every other day or so and mopping with either a steam mop or a sponge mop about once a week – but I really wasn’t sure how it would work on our floors. We have wide plank hardwood in the south wing (which is badly scratched and dinged up and needs to be sanded and refinished, but that’s another tale) and engineered hardwood in most of the north wing.

I was STUNNED by how well it cleaned.
I made things a little more straightforward by putting the chairs up on top of the dining table, like you do at the end of the shift at the restaurant, and I moved most of the spinning wheels out of the way so it would have fewer obstacles to go around. Then I just watched.
The cats weren’t quite sure what to make of it at first, but after stalking it for a little while, they decided it was harmless and ignored it. It went under the couch and around the table legs and puttered back and forth across the floor for about 45 minutes.
By the time it was done, the microfibre cloth was thoroughly loaded with pet hair and dirt, because I hadn’t done a preliminary sweep with the broom – I wanted to see what it could do by itself. As it went around the room, I did occasionally swipe the dust bunnies off the side, but when it returned the starting point and sang it’s little “all done now” song, I was amazed. The floor felt way cleaner to my bare feet than it does after sweeping: no doubt the effect of having been gone over very slowly with a microfibre cloth rather than quickly with rather tired synthetic broom bristles.
Now that the worst of the dust and dirt were picked up, I filled the little water reservoir at the sink, rinsed and wrung out one of the damp mopping pads, and set Matilda loose again.
(She is called Matilda because the movement of the mopping action looks like a waltz step to me: forward and to the right, back, forward and to the left, back, forward and to the right…)
The damp mopping amazed me even further.
The floor is CLEAN.
I am barefoot, and it feels wonderfully clean. Of course it’s not as clean as having been scrubbed on hands and knees, but it’s way cleaner than I normally get it, even with the steamer. Again, no doubt because it has been gone over slowly and methodically with a damp cloth, rather than quickly and haphazardly with a squishy mop.
And I didn’t have to do any scrubbing. Or sweeping. I washed the mats, since they needed to be picked up anyway and were pretty dusty, and I moved a few things around to clear the path, and that was it. While Matilda swept and mopped, I worked on an assignment that needs to be done for the weekend.
Now, see, you need to realize that I do not like gadgets in general. I used to have a food processor, but I got rid of it: I prefer a bowl and a spoon for mixing and a knife and board or my v-slicer for chopping things. I don’t want a rototiller. I have no need of a panini press or a toaster oven or an electric can opener or any of the fancier gadgets. This high-tech machine is not the kind of thing you’d expect a girl like me to be impressed with. I mean, it sweeps and mops. I can sweep and mop.
Except that when I sweep and mop it costs me spoons. When I sweep and mop, it costs me spoons and even then, it’s not a great job – it’s just enough: never any more than enough, and often not quite enough, truth be told. But I have so few spoons to go around and such a big list of things to do that it gets tough to prioritize floor mopping.
Matilda is not a gadget, see.
Matilda is spoons. In a little black box that meanders across my floor in near silence, quietly sweeping up the mess and leaving me free to spend my spoons on other tasks.
The Reluctant Farmer bought me spoons.
George the calf has has his two summers and a winter, and it’s time for his ride to the last stop before the Big Pasture in the Sky. However, he was originally scheduled to go last Friday … but there was a snag at the butcher’s and they needed to rebook to this Friday … and then today when we went to hook up the trailer to the borrowed truck, we found that the hitch ball was the wrong size (and very firmly stuck in place). So, we just rebooked for next Friday when the Cruiser will be home, which we know for sure has the right hitch. George can mow the pasture grass for one more week.
So, instead of heading to the butcher I built a sheep feeder. I’d been doing some research on different feeder shapes, again. The one we’ve been using wasn’t bad: it’s essentially a piece of hog panel stapled to the fence posts with a piece of plywood tied to the back on an angle, making a sort of V shaped trough into which the hay is pitched twice a day. The only problem with that set up is that the bigger sheep climb up on the panels and reach over to eat, which is hard on the panels and sometimes pulls the staples out, and the smaller ones stick their heads right through the squares on the panels and occasionally (or frequently, depending how stupid the particular sheep is) get stuck there. Yanking them out several times a day gets old fast (but they STILL put their heads through).
I was also hoping to find something that could hold a little bit more at one shot, so that I can maybe get down to one feeding per day instead of two. I settled on something like the Premier fenceline feeder, as I think the angled base will help the hay settle to where it’s easily accessible, and with higher sides, I can get it pretty full.
I built a small one in the ‘sleeping pen’ today as a test run, and it worked out pretty well. It wasn’t even all that difficult.

The Boy assisted by cutting a hog panel in half the long way, with the side with the smaller openings being reserved for the base of the feeder (the other piece is actually attached underneath, to serve as a fence and prevent anyone from escaping under the feeder).
The front and back are made from fence boards screwed into fence posts: the back posts were already there, they were part of the original fence, and the front two posts were added today and not pounded in as deep so that the front of the feeder is high enough that the sheep can’t climb up on it (or jump over it).
Two thicker boards (2x4s, well, I think one is a 2x6, but whatever, it’s the 2 that matters) are screwed to the inside of the posts, the front board higher than the back, and the cut hog panel piece laid on them. Fencing staples are hammered over the wires of the panel to hold it to the boards, and then thinner boards are screwed to the inside of the fence posts going up the front and back of the feeder, creating a big trough. I left gaps between the boards to allow air circulation, save on lumber, and let me see how full the feeder is without having to go outside and peer down into it.
Here is a sheep’s eye view:

I can probably lower the whole thing a little bit, most of our sheep are pretty short. I’m also going to cut the hog panel one more ‘square’ up from the bottom on the next one, making the angled base a little bigger in area.
The hay is going to fall through and collect on the ground under the feeder, but the sheep will eat that stuff too – they do quite well eating off the ground, actually, if they don’t end up lying in it. We’ll see how these go – the plans actually call for a tray underneath to catch the hay as it falls through, so that’d be another option (I figured the ground made a perfectly acceptable tray … we’ll see).
This is a small one and won’t hold very much hay at one shot – hopefully if I extend the bases on the long row of feeders I have yet to build, I can widen the whole assembly a little and get a bit more in at one time.
It’s really hot out today, but it was good to get this done. I’ve wanted to have a feeder next to the sleep shelter for some time now, because we can use that area as a catch pen (with a little creative fencing, which is on the list of things to do before winter as well). If you fill that feeder, everyone will run into the pen and then you just slam the gate before they figure out that you are trying to catch them in there. Sheep are very easily bribed with food.
Okay, that’s enough hard work for one day … I’m going to go rest now!
The shape of the pastures and barnyard is an evolving thing, still. I would like it if we could just figure it out and stick with one good, workable design … but we are farm rookies, really. Every year we discover something else that sounded like a good idea until we had to live with it for a whole winter.
The impetus for this current change is that I wanted a way to have the water trough ‘downhill’ from the house, so that the water cubes we have to capture rainwater from the roof can be hooked up to the trough all summer and keep it filled without any intervention from us. Lots of fresh water, no work for the humans, that’s a good deal, right?
I also wanted it positioned so that in the winter we don’t have to run the water heater’s extension cord through the barnyard. It gets stepped on, unplugged, and generally abused when it is in the way of animal traffic, so there needed to be a way to go around. The spot downhill where the water could go for the summer would work well in that regard, but there’s just one problem: sharing.
In the past, we’ve kept the sheep and cows completely separate all winter. They run together in the summer, sharing the pasture, and they get along just fine (the calf chases the sheep around sometimes, but it’s all in good fun), but in the winter it is important to feed the two separately, or the cows will bully the sheep away from the hay. Also, after the lambs arrive there definitely needs to be a place to get away from the Big Creatures.
What we did before was keep them completely separated, with the water trough under a fence so that one half of it was available for the cows, and the other for the sheep. This works, mostly, but there are always headaches of one kind or another.
The solution (well, the solution we’re going to test out this winter) will be to have the water in the new watering pen area, and everyone will walk over there to get a drink. It isn’t very far from the feeders and shelters, and keeping the animals walking a little bit in the winter is good for them, so that’s a feature, actually. The cows will have their winter shelter and pasture area, like before, and the sheep will have theirs … and there will be a passageway into the sheep pen the sheep can fit through but the cows can’t. That way everyone can get to the water, and the sheep can go wherever they like … and get away from the cows when they need to.
Today I got the fence up around the new watering pen – The Boy had gotten one end fenced and most of the posts put in, so all I needed to do was stretch the wire and staple it on, put up the gate and pound in one additional post. I always end up redesigning the solutions when I’m outside working, and as I was moving fences today I realized that with one small shift in the position of a gate, I could eliminate a whole lot of work and at the same time meet the requirement that the animals be able to get from any of the pastures back to the barnyard and watering pen. As it stands now, they can get from any of the three main pastures to the barnyard area, which has shelter for them from the sun or from a summer storm and has access to the water area as well. We have a fourth pasture that will have to be treated as an extension of it’s neighbour for now: it needs some more fence work done on it to be sheep-secure anyway, so there’s no urgency there.
The good news is that for the remainder of the summer, the water should be a low-maintenance thing … as long as the water barrel is full and the float valve doesn’t get knocked loose, we’re good to go. There are some finishing touches necessary – the float valve needs to be screwed in place, the fence needs barbed wire run along the top and bottom (we have discovered that woven wire alone does not stand up to the cows, dogs, and sheep – they lean on it or wiggle under it and in no time it’s bent and useless), and there’s one spot at the end where the wire didn’t quite reach that needs some boards put across it for reinforcement. However, what did get done is a good day’s work, so now I can sit down and knit with a clean conscience.
The weather forecast is FINALLY calling for some rain this week, which is good - we have had no rain but a few little sprinkles not worth putting a coat on for since our last snowfall, which is just plain weird. And the grass needs some rain to clue it in that it's time to GROW!
However, today is a sunny day and a good day to work outside. And Pasture A is just getting to the ‘edible grass stage’, and Pasture C where everyone has been for the last few days (since it seemed cruel to keep them locked up any longer in such nice weather) is looking pretty used up. With rain coming, today was the day to do the work so The Boy and I went out and repaired the fences in Pasture A and got everyone moved over. The fence we fixed today is one of the first fences we ever put up, so it was pretty awful. Some wire had to come down, a few more posts had to be pounded in, and then we strung barbed wire instead of woven wire along that side, as it's really hilly and it's almost impossible to get woven wire to go up properly with hills and dips. You need a LOT of strands of barbed wire to hold sheep in though, and the posts have to be really close together (even more so with all the darned hills and dips), so it was a lot of work. Went out at 11 or so, came in around 4. I am a little sunburnt and a lot tired.
But, a job that needed doing has been done. And I ache and feel very worn out but at least I was productive so I feel good on the inside. And the critters now have decent grass to eat, and access to their shade and water, and the fence reallocation plans are gradually evolving in my head. The goal is to have a setup that allows access to water and shade from every pasture, with alleyways and access gates to optimize traffic flow and minimize infrastructure headaches. Yeah, it’s an ongoing, evolving process, but it’s slowly coming along. A few new ideas started percolating in my head today, I need to do some drawing and see what might actually be made to work.
Now, though, it’s rest time. My audio book and knitting await!


